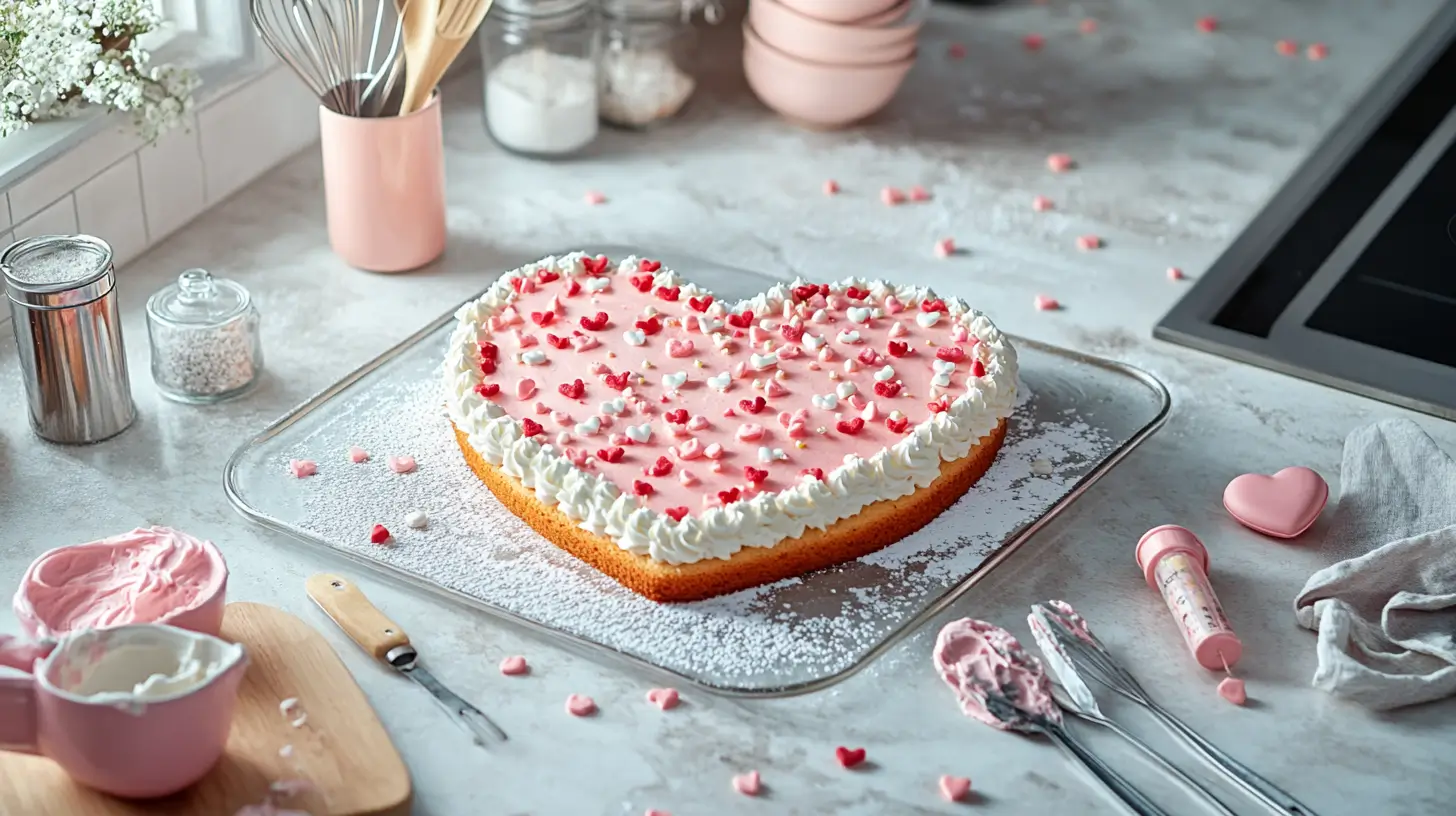
A heart cake is more than just dessert; it’s a symbol of love and thoughtfulness, making it the perfect centerpiece for romantic occasions like Valentine’s Day, anniversaries, or even weddings. With its beautiful cake layers, this treat not only looks stunning but also delivers a delicious experience in every bite.
Building a layered heart cake adds an extra touch of elegance and indulgence. You can create multiple layers with flavors like classic vanilla, rich chocolate, red velvet, or even fruity options like strawberry or lemon. Filling these layers with buttercream, ganache, or fruit preserves enhances both the flavor and texture, making each slice a delightful surprise.
The best part? It’s easier to make than you might think! Whether you’re a seasoned baker or a complete beginner, this guide will walk you through the process of creating a heart cake with perfectly even layers that tastes just as amazing as it looks.
Get ready to impress your loved ones with a homemade, multi-layered heart cake that’s sure to steal the show!
Table of contents
Essential Tools and Ingredients for Making a Heart-Shaped Cake

Must-Have Baking Equipment
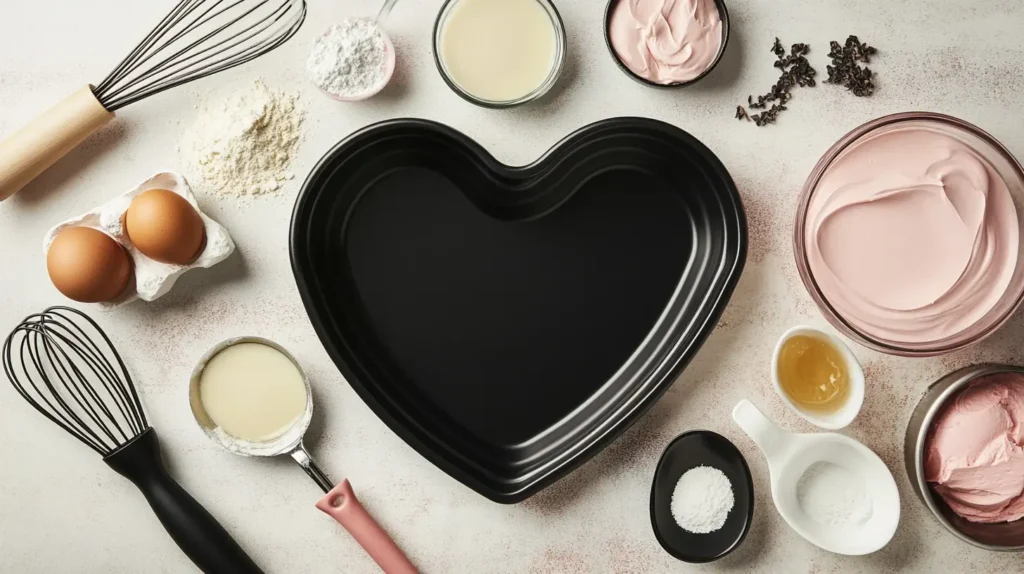
To start your heart cake journey, gather essential tools:
- Heart-Shaped Cake Pan: This is non-negotiable for achieving that iconic shape. If you’re new to baking, silicone pans are a beginner-friendly option for easy release.
- Basic Baking Tools: Whisks, spatulas, and measuring tools are indispensable for precise measurements and mixing.
- Decorating Tools: Invest in piping bags, offset spatulas, and a turntable for effortless frosting and decorating. These tools make even a beginner feel like a pro.
Ingredients You’ll Need
Creating a heart cake starts with the right ingredients:
- Cake Base: Use staples like all-purpose flour, sugar, eggs, and butter. For vegan options, try almond milk and plant-based butter.
- Frosting Options: Buttercream is classic, while whipped cream adds lightness. For a romantic twist, consider strawberry frosting or chocolate ganache.
- Decorative Add-Ons: Elevate your cake with sprinkles, edible flowers, or chocolate hearts. Fresh fruits like strawberries can add vibrancy and flavor.
Choosing the Right Heart-Shaped Cake Flavor
- Classic Flavors: Chocolate and vanilla remain timeless favorites that are universally loved. Whether you’re making a romantic Valentine’s Day cake or a simple anniversary dessert, these flavors provide a familiar and comforting base that never disappoints.
- Creative Twists: Elevate traditional flavors with unique pairings like chocolate with salted caramel, vanilla with tangy lemon curd, or red velvet with a rich cream cheese filling. These combinations add a delightful contrast, enhancing both taste and texture for a memorable dessert experience.
- Match Flavors to the Occasion: Consider the season and event when selecting flavors. Light, fruity flavors like strawberry, passionfruit, or citrus-infused cakes are perfect for spring and summer celebrations. In contrast, rich, decadent options such as dark chocolate, mocha, or spiced carrot cake suit cozy winter events.
By choosing the right flavor profile, your heart cake will not only look beautiful but also taste incredible, leaving a lasting impression on your guests.
Step-by-Step Instructions to Bake Your Heart-Shaped Cake

Preparing Your Tools and Ingredients
Before you begin baking, preparation is key:
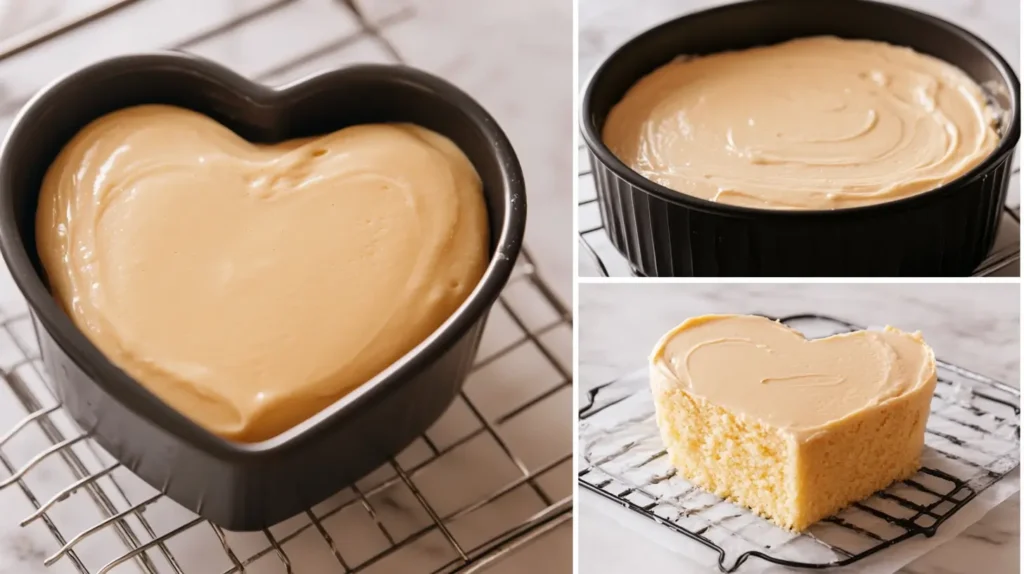
- Grease Your Pan: Use butter or a non-stick spray, and line the base with parchment paper for easy removal.
- Preheat the Oven: Set your oven to 350°F (175°C) to ensure even baking.
- Measure Ingredients Accurately: Precision is crucial; use a kitchen scale for dry ingredients and liquid measuring cups for wet ones.
Mixing and Baking the Cake
Follow these steps to create a perfect cake base:
- Make the Batter: Cream butter and sugar until light and fluffy. Gradually add eggs, alternating with dry and wet ingredients, until just combined. Overmixing can lead to a dense cake.
- Bake It Right: Pour the batter into your greased heart-shaped pan and tap it gently to remove air bubbles. Bake for 30-40 minutes, checking doneness with a toothpick.
Cooling and Leveling the Heart-Shaped Cake
- Cooling Tips: Allow the cake to cool in the pan for 10 minutes before transferring it to a wire rack to prevent cracking.
- Leveling for Perfection: Use a serrated knife to trim uneven tops, ensuring a flat surface for decorating.
Decorating Ideas for Beginners

Easy Frosting Techniques
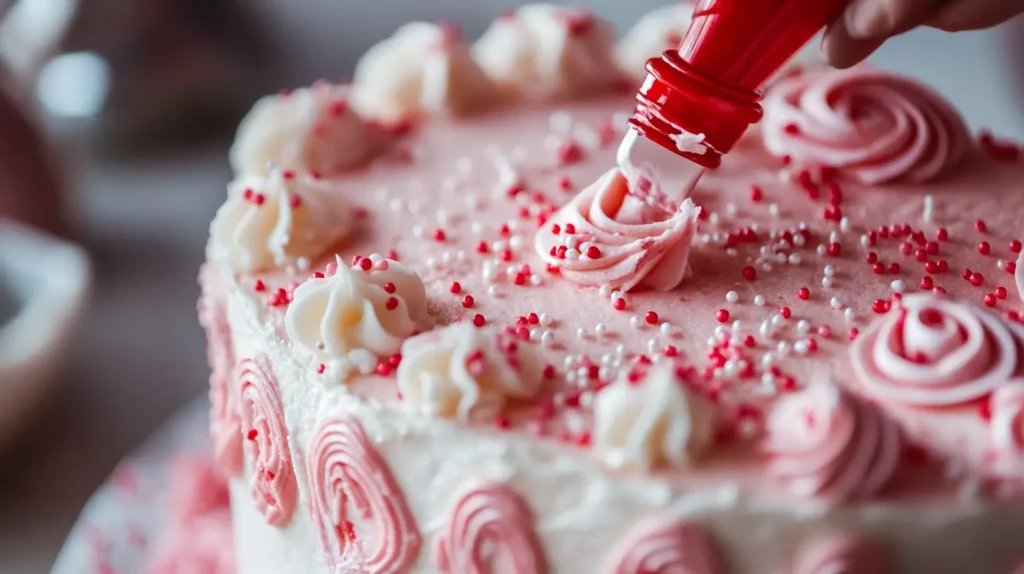
- Apply a Crumb Coat: Start by spreading a thin layer of frosting over the entire cake to trap any loose crumbs. This base layer ensures a smooth and professional-looking final coat. Once applied, chill the cake for 15–30 minutes to allow the crumb coat to set before adding the next layer of frosting.
- Smooth It Out: For a clean, polished look, use an offset spatula to evenly spread the frosting. A cake turntable makes the process easier by allowing smooth and controlled movements. For ultra-sleek results, use a bench scraper to refine the edges and create a bakery-quality finish.
- By mastering these simple techniques, you’ll elevate your heart-shaped cake’s appearance, making it look as incredible as it tastes!
Creative Toppings and Add-Ons
- Edible Decorations: Add a touch of fun and elegance with edible glitter, chocolate curls, or colorful sprinkles. These simple yet eye-catching elements can bring a playful or sophisticated vibe to your heart-shaped cake. Whether you’re going for a shimmering, romantic glow or a vibrant, festive look, edible decorations make your cake visually appealing and irresistible.
- Fondant Finishes: For a sleek, professional appearance, consider covering your cake with rolled fondant. This smooth and polished finish creates a flawless canvas for additional designs like embossed patterns, hand-painted details, or delicate sugar flowers. Fondant also allows you to experiment with bold colors or ombré effects, giving your heart cake a stylish and modern touch.
- With the right decorative elements, your heart cake can be as breathtaking as it is delicious—perfect for making any romantic celebration unforgettable!
Themes for Special Occasions
- Valentine’s Day: Embrace the spirit of love with pink and red hues, heart-shaped candies, and playful decorations. Consider using strawberry or raspberry buttercream, red velvet cake, or chocolate-covered strawberries for an extra romantic touch. Adding edible glitter or gold accents can elevate the festive charm of your cake.
- Anniversaries: For a timeless and sophisticated look, go for minimalist designs featuring pearl accents, metallic finishes, or sleek buttercream textures. Subtle colors like ivory, blush, or champagne add an elegant feel, while personalized messages or monogrammed initials make the cake extra meaningful.
- Weddings: A wedding heart cake should exude romance and refinement. Opt for pastel tones, delicate fondant draping, and fresh floral arrangements to create a dreamy aesthetic. Soft buttercream textures, lace piping, or sugar flowers can enhance the elegance, making your cake the perfect centerpiece for a romantic celebration.
No matter the occasion, a well-designed heart-shaped cake is a beautiful way to express love and create lasting memories.
Common Mistakes to Avoid When Making a Heart-Shaped Cake
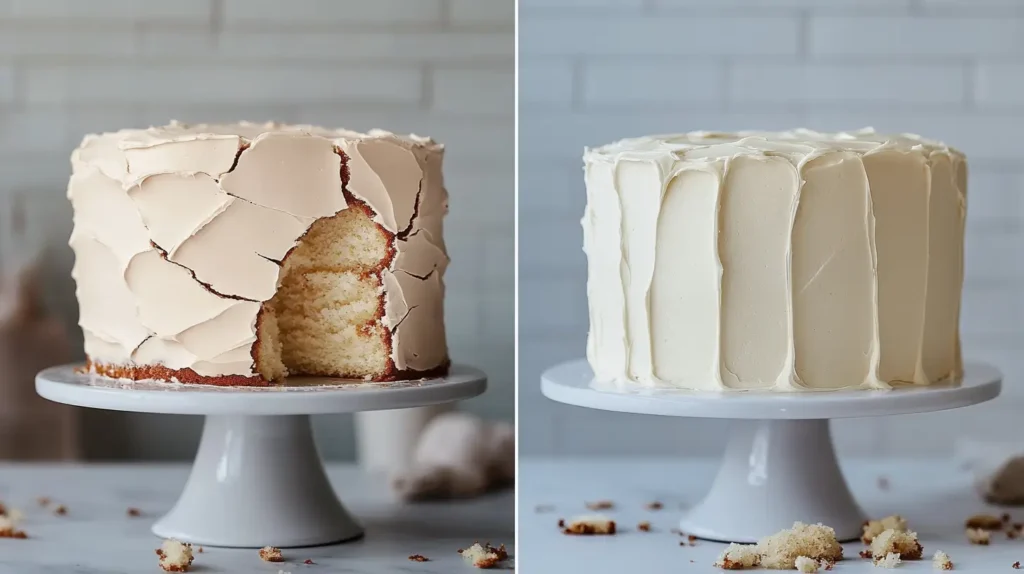

Baking Mishaps
Overmixing Batter: When baking a heart cake, It’s tempting to mix your ingredients until they’re fully incorporated, but overmixing the batter can lead to a dense and tough texture, which is not ideal for a light and fluffy heart cake. The key to avoiding this mistake is to mix just until the dry ingredients are absorbed into the wet ones.
Overmixing activates gluten in the flour, making the cake less tender, which can affect the cake layers and how well they stack. To prevent this, use a gentle folding technique with a spatula or spoon, and stop mixing as soon as you no longer see any dry flour in the batter.
Additionally, when using an electric mixer, be mindful of both speed and time. Mixing on a lower speed helps the ingredients blend evenly without incorporating too much air or gluten, ensuring a moist and airy cake that holds up well when you cake layer on top for a multi-layered design.
Once your cake is baked, crumb coat the cake before adding the final frosting to create a smooth finish. This thin base layer traps any loose crumbs, making it easier to frost evenly, especially on the top of the cake where crumbs can be most noticeable.
For the best results, choose cake recipes specifically designed for layered cakes, as they provide the ideal structure and texture for a beautifully stacked heart cake. Follow these tips, and your cake will turn out light, fluffy, and perfectly layered every time!
Pan Problems:
Pan issues can easily sabotage a beautifully baked heart-shaped cake. One of the most common problems is the cake batter sticking to the pan, which can ruin the cake’s shape, presentation, and even the sides of the cake. Uneven or torn sides can affect how smoothly your frosting applies and impact the final look of your masterpiece.
To prevent this, be sure to generously grease your pan with butter or oil and line it with parchment paper. This ensures that the cake releases easily from the pan once it’s cooled. If you’re using a heart-shaped pan, pay extra attention to the sharp corners, edges, and sides of the cake, as they are the most susceptible to sticking.
For even more protection, lightly dust the pan with flour after greasing, or use a non-stick baking spray that combines both oil and flour. This extra step ensures your cake bakes evenly and comes out with smooth, intact sides, making decorating a breeze.
By following these simple tips, you’ll have a perfectly shaped heart cake with flawless sides, ready to be layered and decorated beautifully!
Decorating Errors
Uneven Frosting: Achieving a smooth and even frosting layer is a common challenge in cake decorating, especially with heart-shaped cakes. The unique shape of the heart can make it tricky to apply frosting evenly. Uneven frosting can make the cake look less polished. To achieve a professional finish, use the right tools. A rotating cake turntable helps you easily rotate the cake while frosting, ensuring consistent pressure and an even frosting layer. Pair it with a small, offset spatula for precise control over frosting thickness and smoothness. Start by applying a thin crumb coat from the center, working outward to lock in crumbs. Refrigerate the cake for 20-30 minutes before applying the final coat for a flawless finish.
Fixing Mistakes: No matter how experienced you are, mistakes are bound to happen during the cake decorating process. Fortunately, heart-shaped cakes are surprisingly forgiving, and you can fix many mistakes with a bit of patience. If you’ve accidentally over-decorated or made a rough patch in your frosting, don’t panic. The first step is to gently scrape off the offending layer of frosting or decorations with an offset spatula. Be careful not to tear the cake’s surface as you remove the unwanted frosting. Once you’ve removed the error, you can apply a new layer of frosting over the cake. If needed, smooth the surface out with a clean spatula or a bench scraper. If there are any areas where the frosting has become uneven, don’t be afraid to add more frosting and build it up gradually until you achieve a smooth surface.
Time Management Tips
Plan Ahead: Baking a heart cake, especially for an event or celebration, can be time-consuming. To avoid feeling rushed and stressed, it’s best to plan ahead. Start by baking your cake the day before you plan to decorate it. This will give the cake plenty of time to cool, which is crucial for ensuring that your frosting doesn’t melt or slide off the cake. You can also store the cooled cake in an airtight container at room temperature or refrigerate it to keep it fresh. If you’re decorating with fondant or detailed piping, giving yourself extra time will allow you to focus on the finer details without feeling rushed. By planning ahead, you’ll also have more time to fix any decorating mistakes and perfect your cake before the big day.
Storage Solutions: Keeping your heart-shaped cake fresh between layers of decorating can be a challenge, especially if you’re making multiple cakes or working with intricate decorations.
The best solution is to refrigerate the cake between each step of the decorating process. For example, after applying a crumb coat or an initial layer of frosting, refrigerate the cake for 20-30 minutes to let the frosting set. This will prevent crumbs from mixing into the frosting and help create a smoother finish when you add the final layers. If you’re working with fondant, it’s especially important to refrigerate the cake briefly before covering it, as it helps the fondant adhere better and reduces the risk of tearing. Just be sure to allow the cake to come to room temperature before serving, as chilled cake can affect the texture and flavor.
Conclusion
Creating a heart-shaped cake is a rewarding experience that blends creativity with heartfelt expression. With the right tools, ingredients, and step-by-step guidance, even beginners can craft a stunning cake that’s as beautiful as it is delicious. Whether you’re celebrating Valentine’s Day, an anniversary, or a wedding, a homemade heart cake adds a personal touch that makes the occasion even more special.
From choosing the perfect flavor to decorating with elegance, every detail helps make your cake a showstopper. Whether you go for a classic, romantic design or a trendy, minimalist look, your creation will leave a lasting impression. Get started today, and don’t forget to share your heart cake masterpiece with loved ones they’ll be amazed by your effort, creativity, and talent!
Related Post
FAQs and Expert Tips for Perfect Heart Cakes
What if I Don’t Have a Heart-Shaped Pan?
You can create a heart shape by combining a square and a round cake. Cut the round cake in half and align the flat edges with the square cake to form a heart.
How Do I Keep My Cake Moist?
Add yogurt or sour cream to your batter, or brush the baked cake with a simple syrup for extra moisture.
Can I Make a Heart Cake Without Eggs?
Yes! Use substitutes like applesauce, mashed bananas, or flaxseed mixed with water for a moist, egg-free cake.
Pro Decorating Tips
- Practice piping designs on parchment paper before applying them to the cake.
- Experiment with ombre frosting or marbled fondant for a trendy look.

